Creating Consistent Characters
On this page
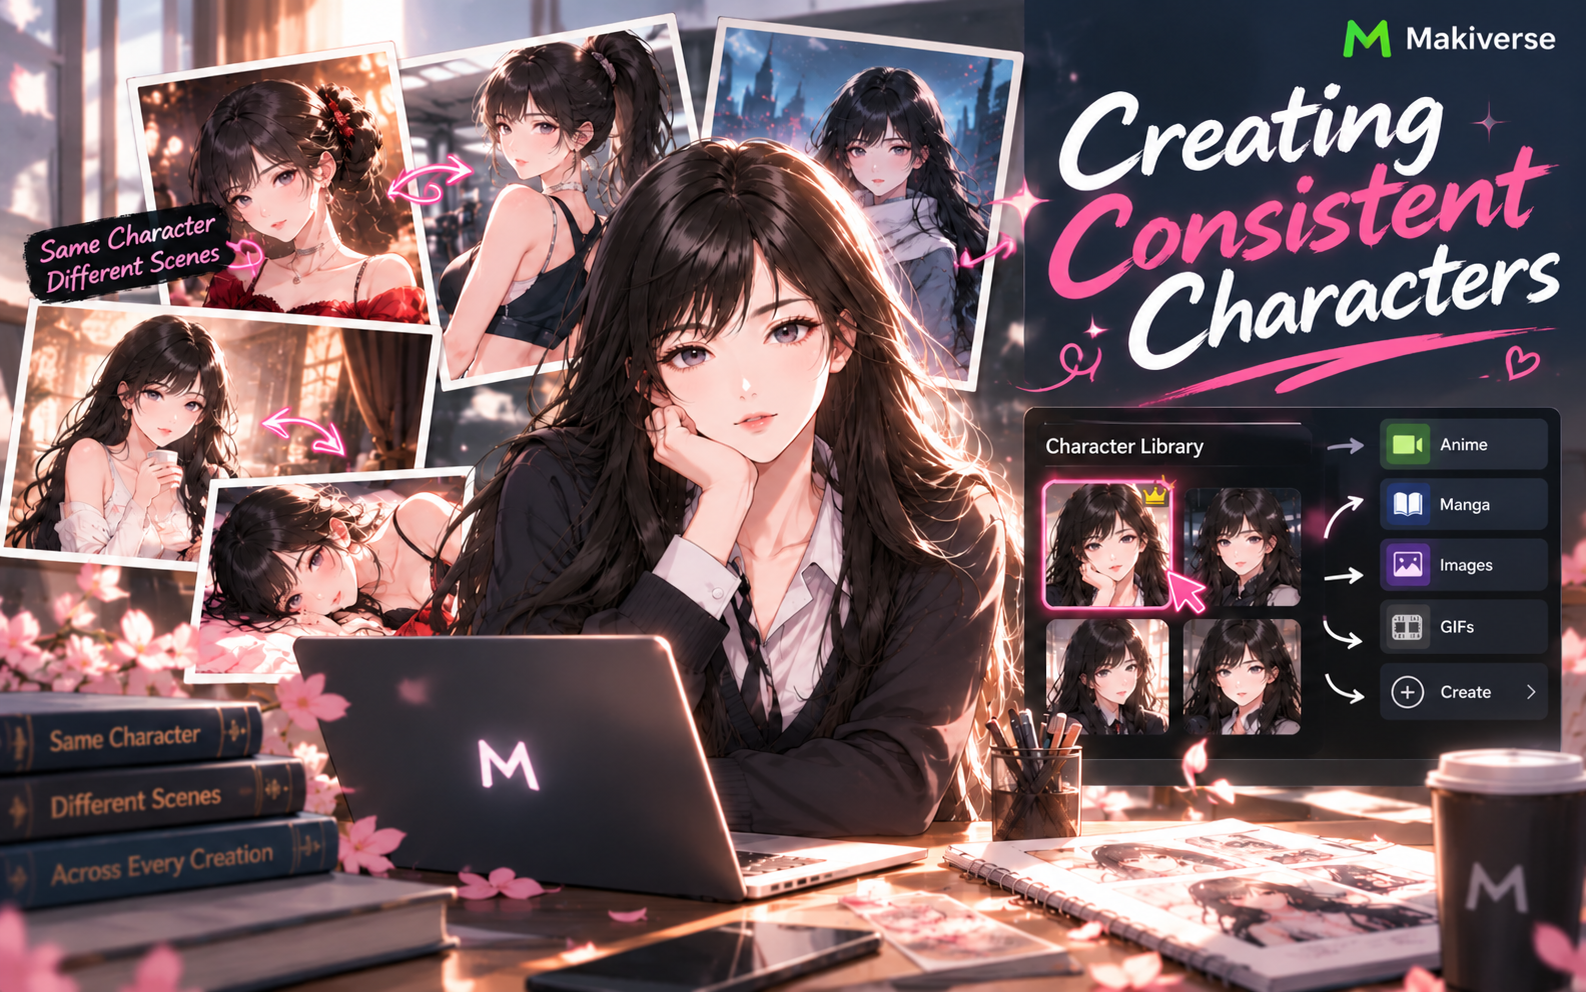
Consistent Characters let you create and save a Character that can be reused across multiple Makiverse generations.
This is useful when you want the same Character to stay visually recognizable across different Images, Manga scenes, GIFs, Anime creations, outfits, poses, and settings.
You can create a Character from a Prompt or use an existing Reference Image as the starting point.
This guide walks you through how to create, save, and reuse a Consistent Character in Makiverse.
Ways to Character from a Prompt
- Use this method when you want to create a new Character from scratch.
- You can describe the Character’s appearance, choose a Style, add Tags, and adjust the available Character settings before generating.
Step 1: Open Characters

Open a Creation Screen in Makiverse, then click Characters in the options bar.
This opens your Character selection area.
Step 2: Create a New Character
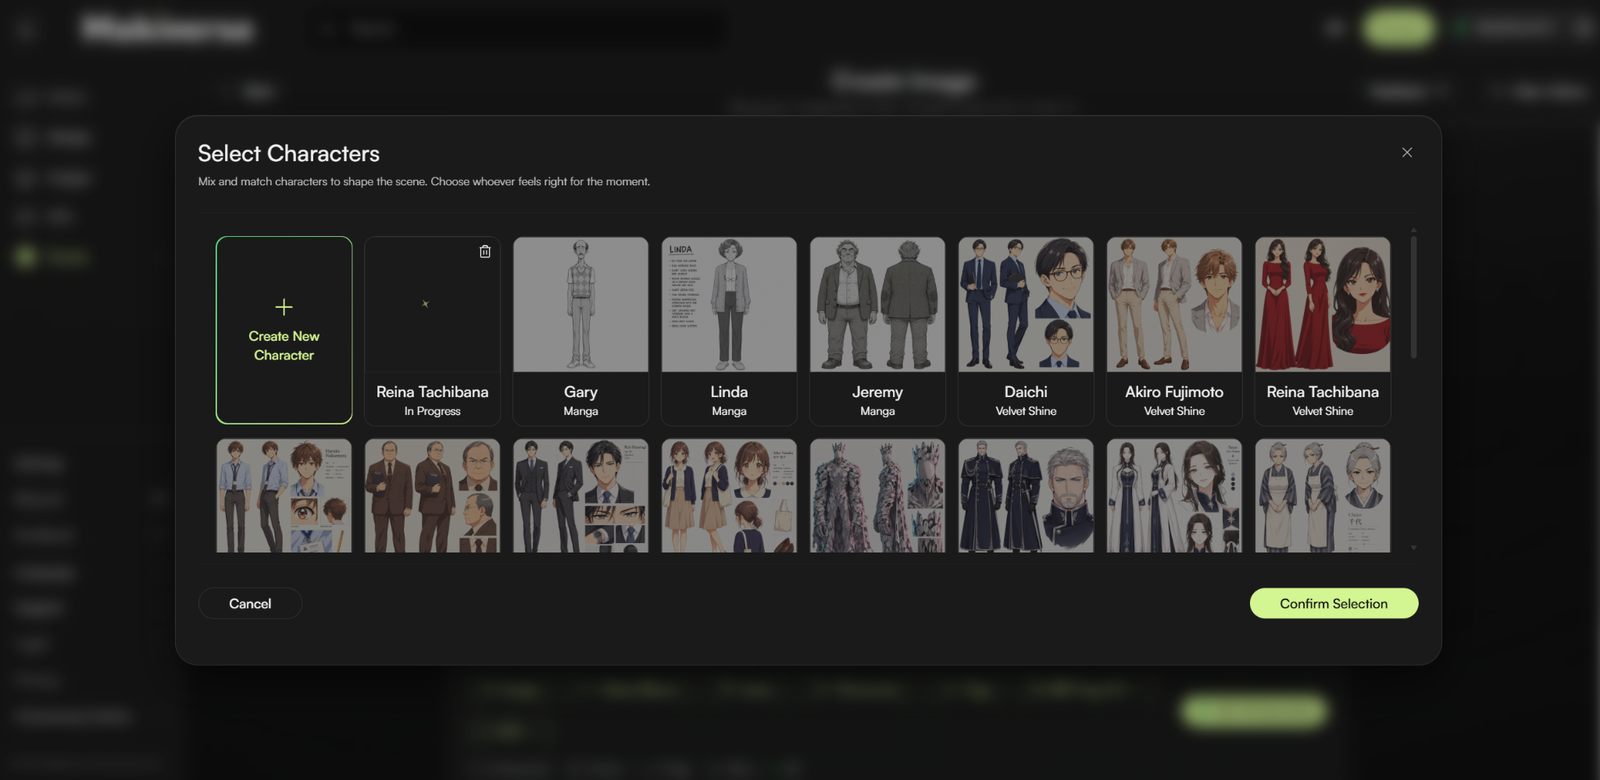
Click Create New Character.
This opens the Character Creation screen, where you can set up and generate your Character.
Step 3: Add a name and Prompt
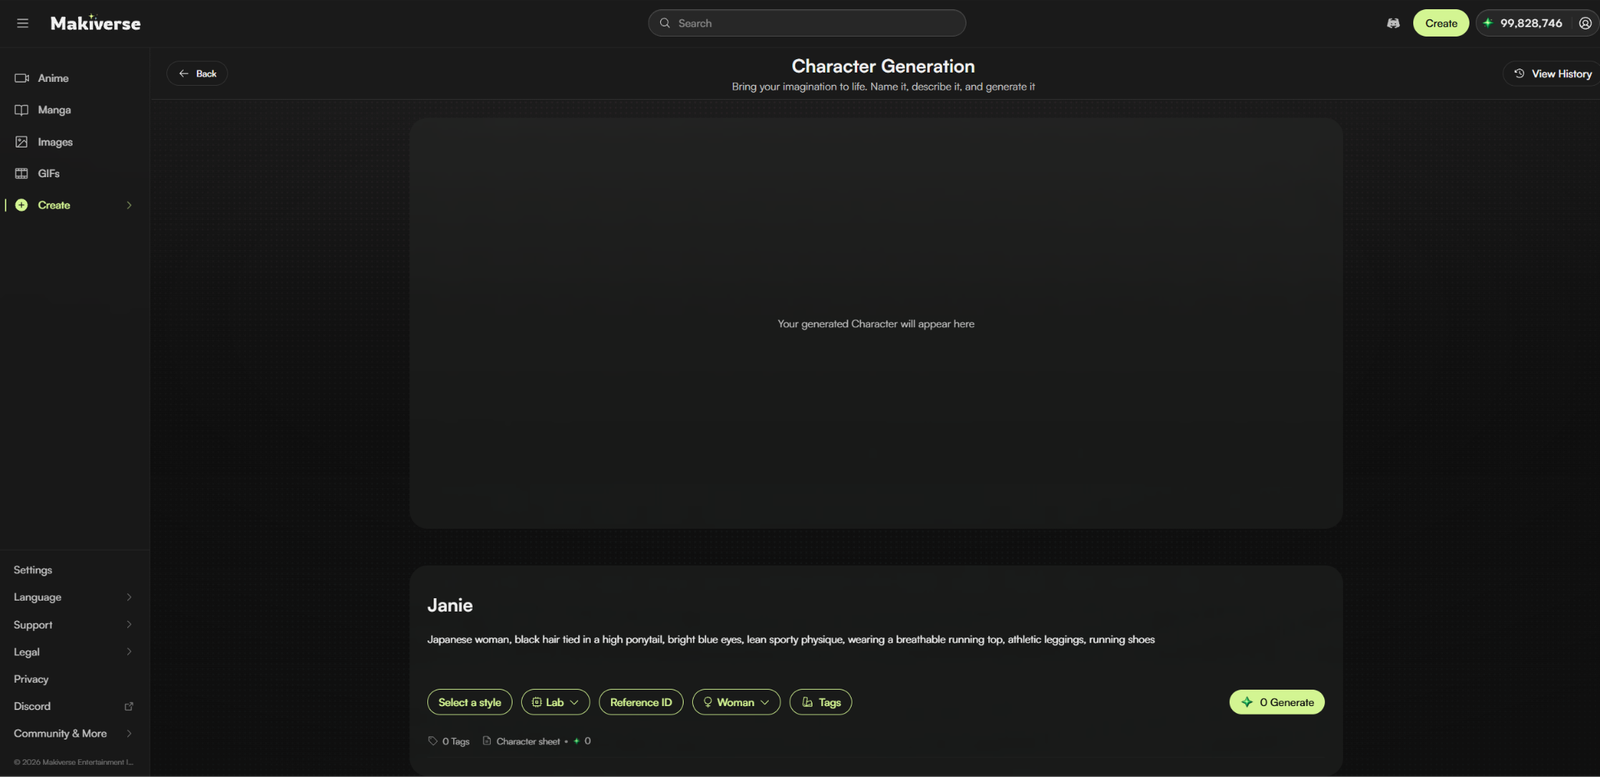
Give your Character a clear Name, then enter a Prompt describing how you want them to look.
For better results, include important visual details such as:
- Hair color and hairstyle
- Eye color
- Body type
- Clothing
- Shoes
- Overall Style
- Distinctive visual details
Example Prompt
Japanese woman with black hair tied in a high ponytail, bright blue eyes, a lean athletic build, wearing a breathable running top, athletic leggings, and running shoes.
Use a Reference Image
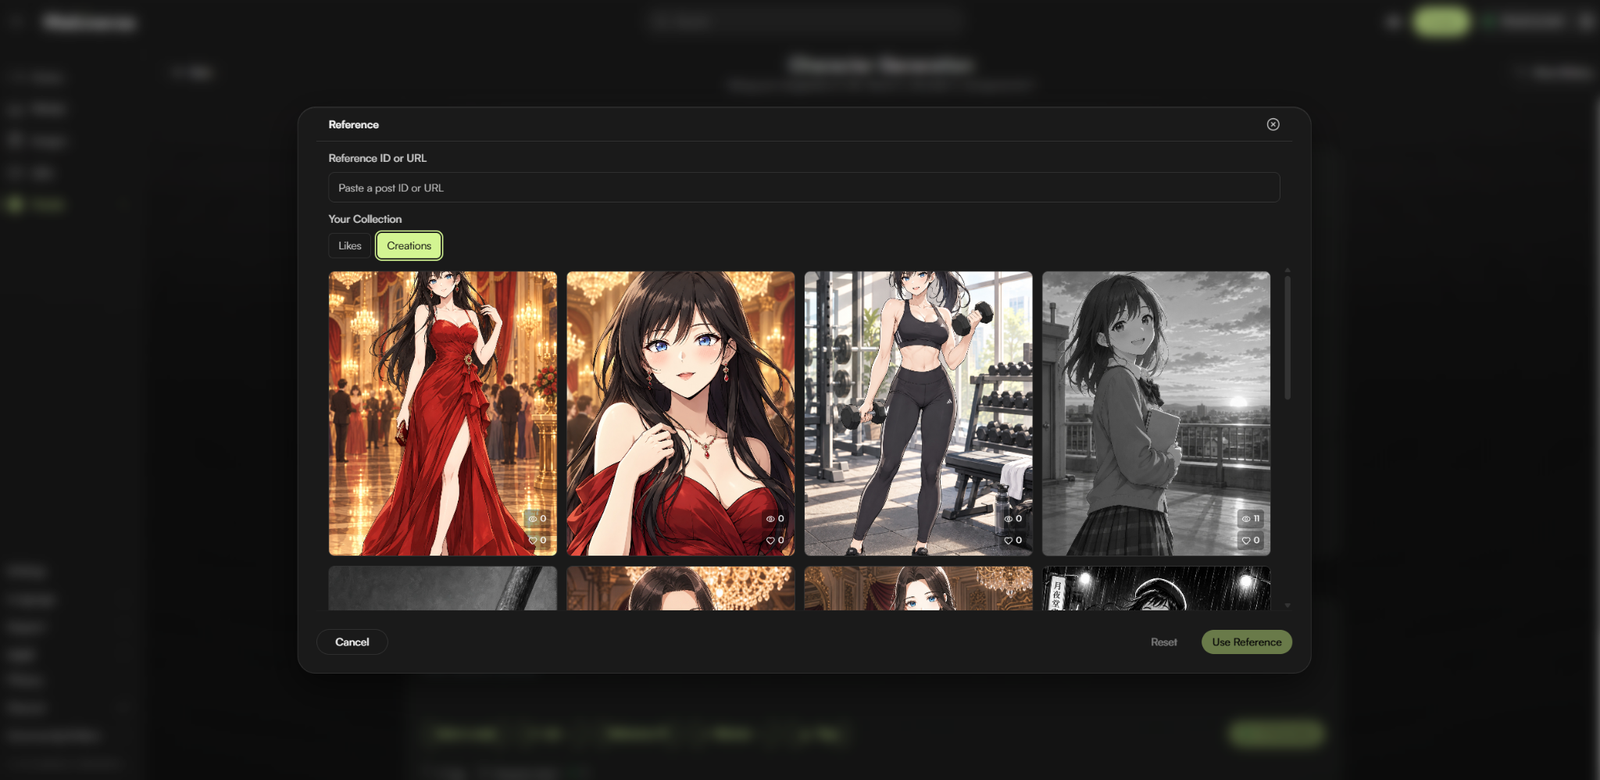
Use this method when you already have an Image you want Makiverse to use as the visual reference for your Character.
Select Reference Image, then choose the Image you want to use.
Depending on the available options, you may be able to select an Image from:
- Your Likes
- Your Creations Library
- A Reference ID
Confirm your selection when you are ready.
Makiverse will use the selected Image as the main visual reference for your Character.
Step 4: Select a Style and Biological Sex
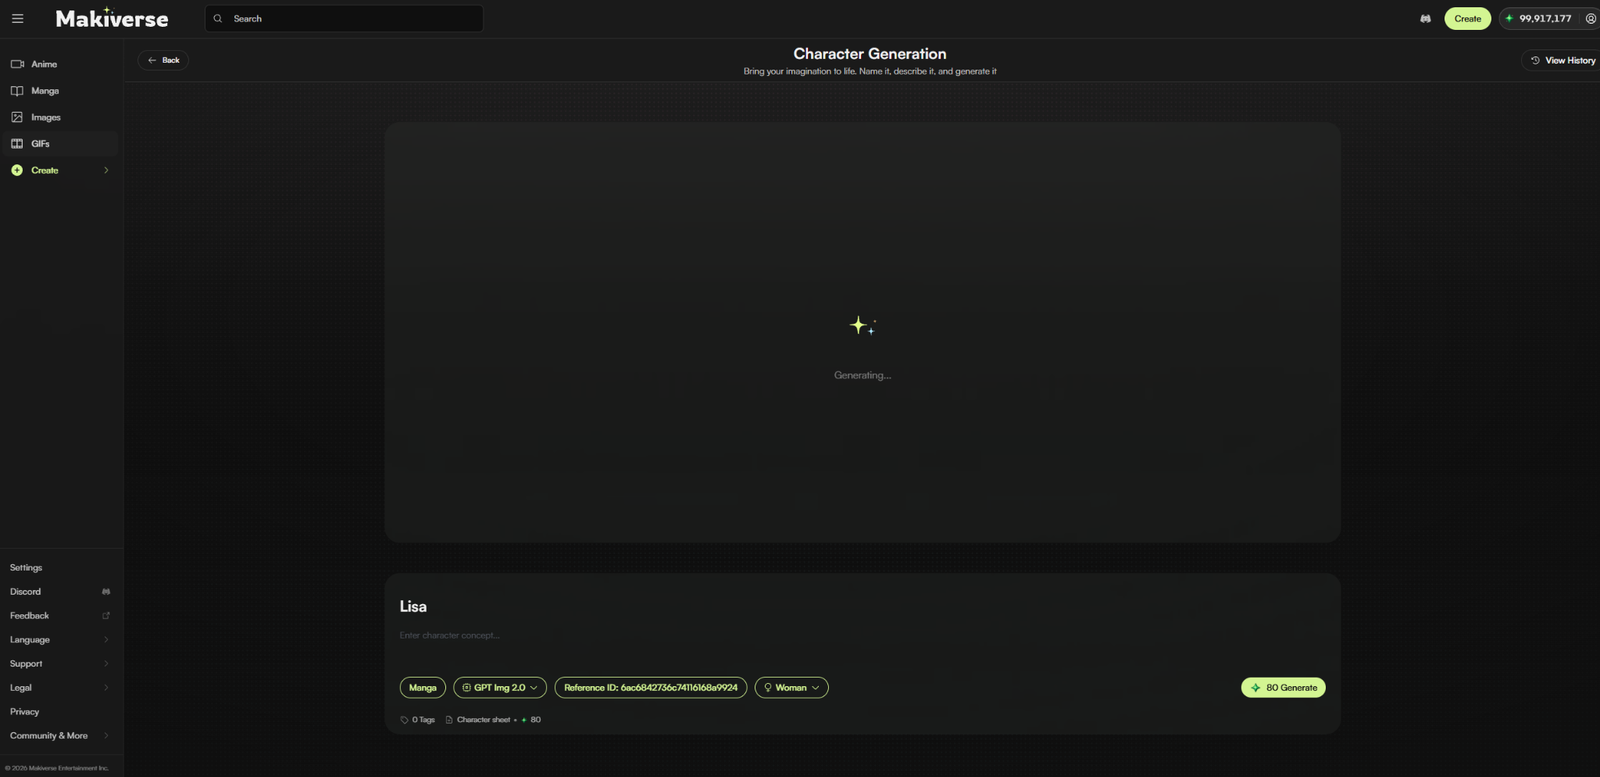
Give your Character a clear Name.
Using a name makes it easier to identify and reuse the Character in future creations.
Step 5: Add tags
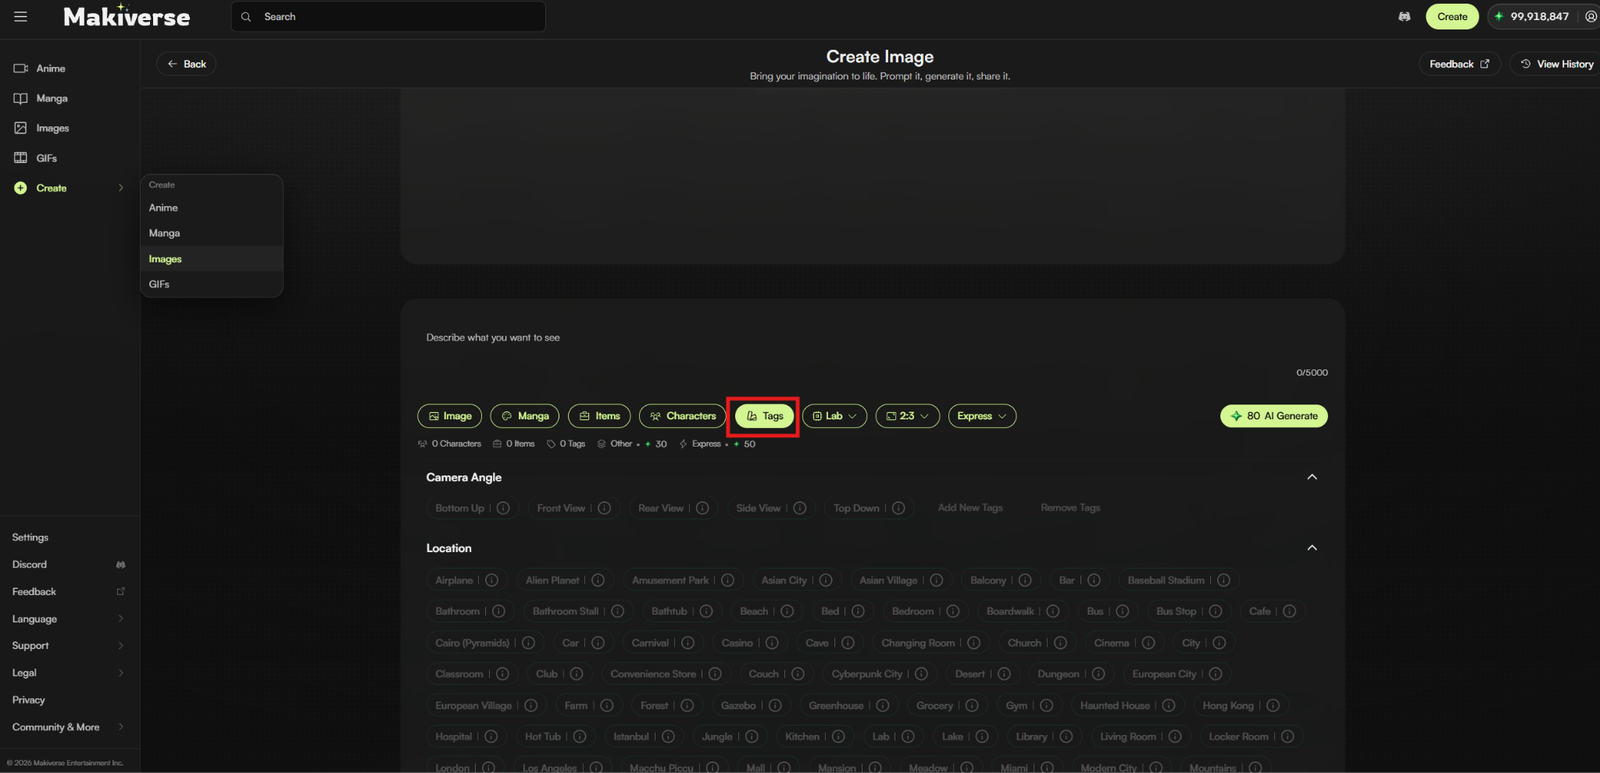
If you are creating the Character from a Prompt, choose the Style you want for your Character.
The selected Style helps define the Character’s overall visual look and artistic direction.
Select the Character’s Biological Sex if that option is available in the Character Creation screen.
Add Tags
If you are creating your Character from a Prompt, you can also use Tags to add preset visual details.
Tags can help guide the Character’s appearance without requiring you to describe every detail in the Prompt.
Tags are optional.
Step 6: Generate Your Character
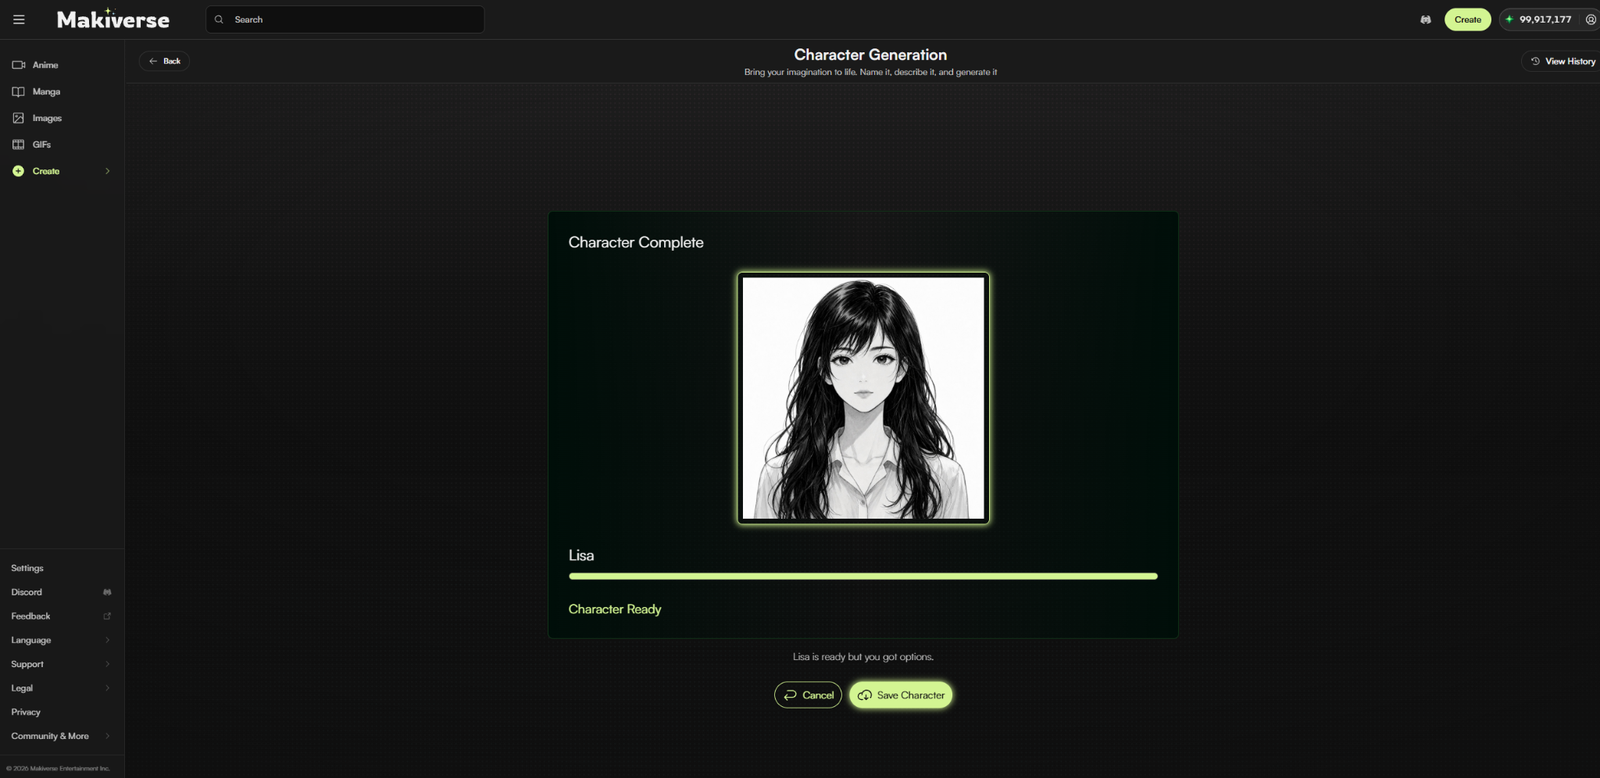
Once your Character details and settings are ready, click Create.
Makiverse will generate your Character.
Review the generated results and select the version that best matches the Character you want to keep.
Once selected, the Character will be saved to your Character Library and can be reused in future creations.
Using Your Saved Character
Once your Character is saved, you can reuse them in different scenes, outfits, poses, and settings while keeping the same core design.
For example, you can place the same Character in:
- A gym
- A ballroom
- A classroom
- A fantasy setting
- Different Images
- Manga scenes
- GIFs
- Anime creations
Example 1: Gym Scene
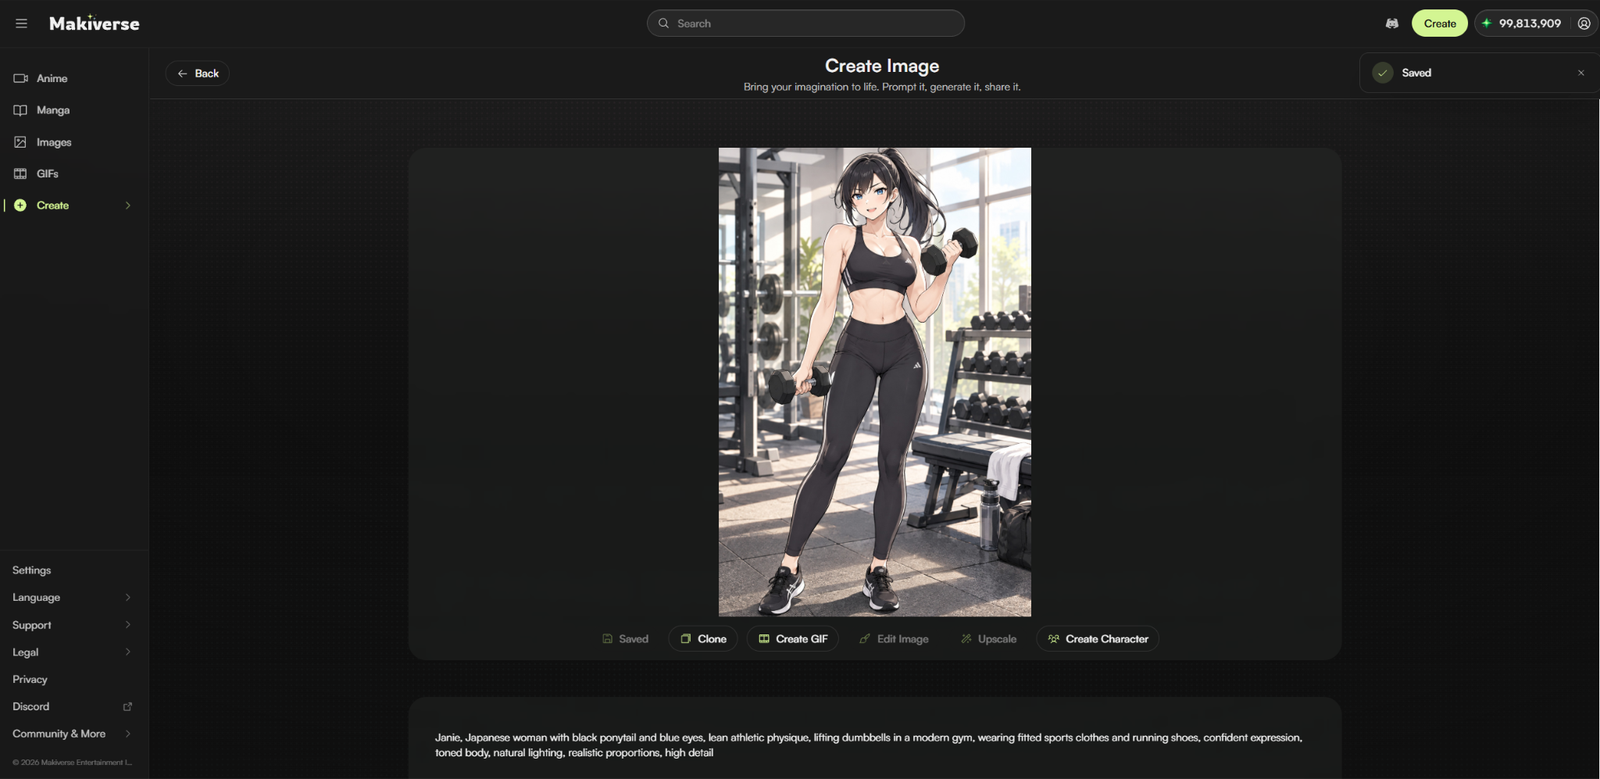
Example Prompt:
Janie, a Japanese woman with a black ponytail and bright blue eyes, with a lean athletic build, lifting dumbbells in a modern gym. She wears fitted sportswear and running shoes, with a confident expression, natural lighting, realistic proportions, and high detail.
Example 2: Ballroom Scene
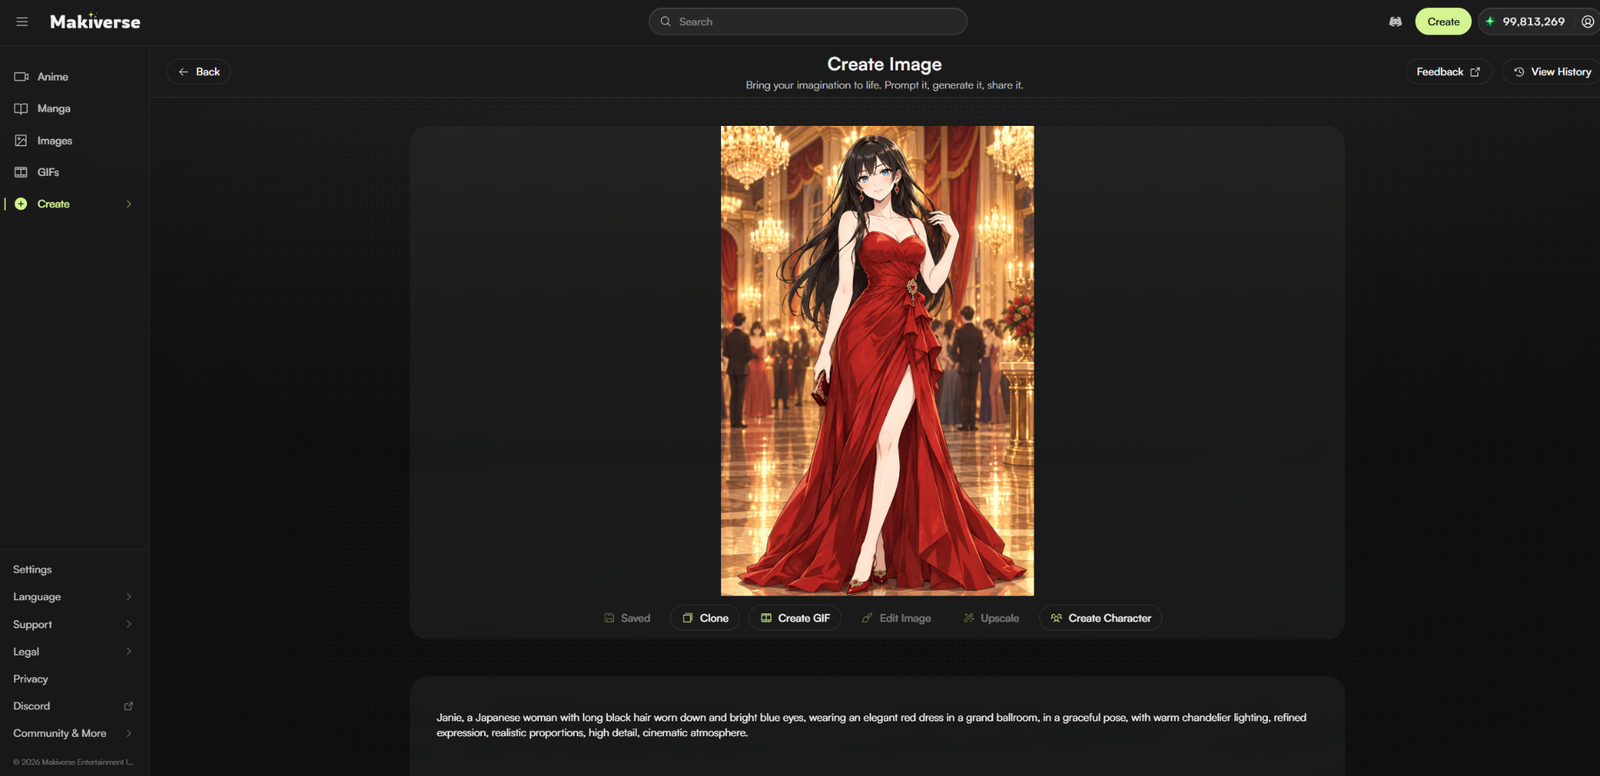
Example Prompt:
Janie, a Japanese woman with long black hair worn down and bright blue eyes, wearing an elegant red dress in a grand ballroom. She stands in a graceful pose under warm chandelier lighting, with a refined expression, realistic proportions, high detail, and a cinematic atmosphere.
You can change the outfit, pose, setting, mood, or action while keeping the Character connected to the saved design.
Create a Character Created from a Reference Image
After a Character created from a Reference Image is saved, you can reuse them in different Prompts and scenes.
The saved Character helps maintain the same core visual identity across multiple generations.
Example 1: Classroom Scene
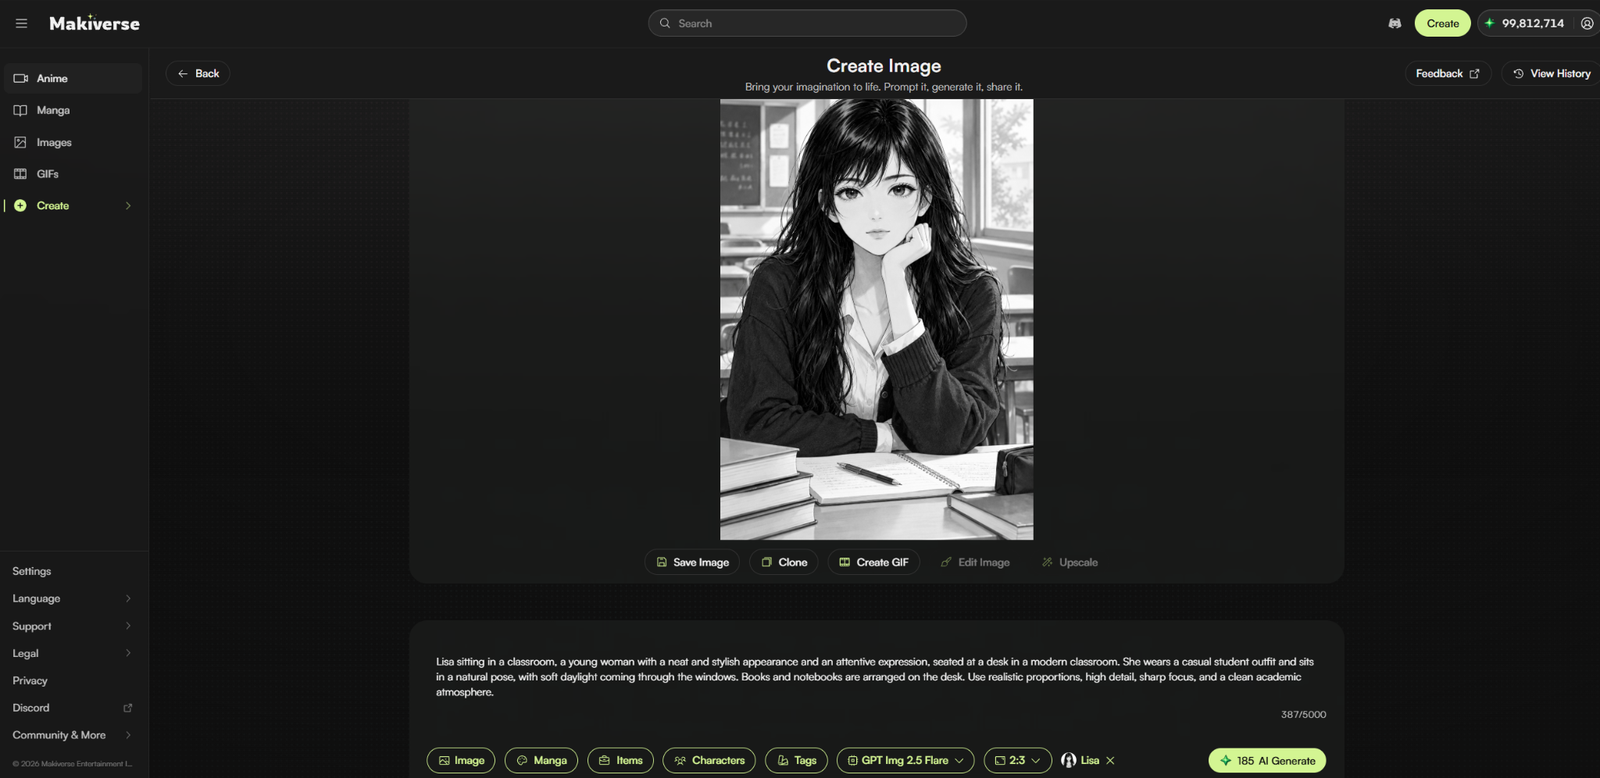
Example Prompt:
Lisa sitting in a classroom, a young woman with a neat and stylish appearance and an attentive expression, seated at a desk in a modern classroom. She wears a casual student outfit and sits in a natural pose, with soft daylight coming through the windows. Books and notebooks are arranged on the desk. Use realistic proportions, high detail, sharp focus, and a clean academic atmosphere.
Example 2: Mech Suit Scene

Example Prompt:
Lisa is wearing a futuristic mech suit, a confident young woman standing in a powerful pose. She is dressed in a sleek, high-tech armored exosuit with detailed mechanical design and glowing accents. She has a strong, heroic expression and stands in a sci-fi setting with cinematic lighting. Use realistic proportions, high detail, sharp focus, and a dynamic futuristic atmosphere.
These examples show how the same saved Character can be used in very different scenes while staying visually recognizable.
Tips for Better Consistent Character Results
Use Clear Visual Details
When creating a Character from scratch, focus on the most important traits, such as hair, eyes, body type, clothing Style, and distinctive visual details.
Keep the Character Setup Focused
Avoid adding too many scene-specific details during Character creation. Save those details for the generations where you use the Character.
Use the Character’s Name in Your Prompts
Including the Character’s name can make it easier to organize and reuse the Character in different scenes.
Choose Your Saved Version Carefully
The version you select becomes your saved Character, so choose the result that best matches the design you want to reuse.
Use a Reference Image When You Already Have a Design
If you already have an Image that closely matches the Character you want, using it as a Reference Image can give Makiverse a clearer visual starting point.
Need Help?
If your Character does not look the way you expected, try:
- Adjusting the Prompt
- Making the Character description more specific
- Selecting a different generated version
- Using a clearer Reference Image
- Simplifying the Character details
For better results, keep your Character details clear, focused, and easy to understand.
If the issue continues, contact Makiverse Support.