Creating Images in Makiverse
The Image Generator helps you turn an idea into a still Image using Prompts, Tags, Characters, Items, Styles, and generation settings.
On this page
How to Create an Image
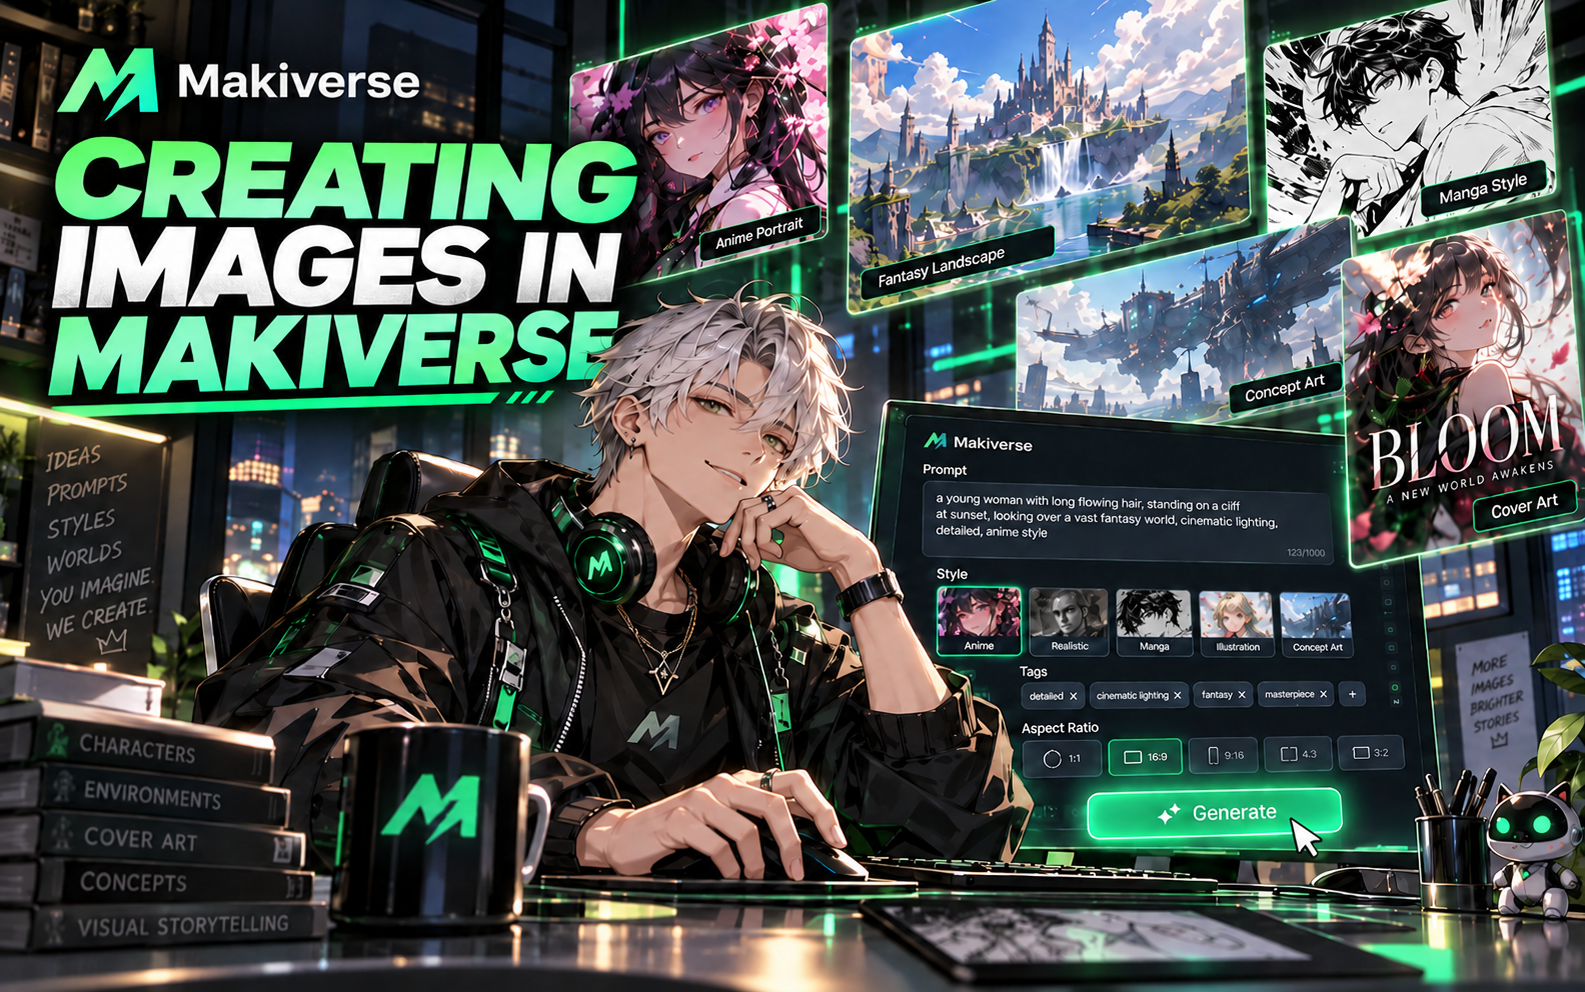
The Image Generator helps you turn an idea into a still Image using Prompts, Tags, Characters, Items, Styles, and generation settings.
Whether you want to create Character art, backgrounds, concept art, or visuals for a larger story, you can customize your scene and generate an Image that matches your idea.
You can use the Image Generator to create:
- Anime artwork
- Manga-style illustrations
- Character portraits
- Backgrounds and environments
- Concept art
- Cover art
- Reference Images
- Fantasy scenes
- Visual ideas for stories
This guide walks you through the complete Image creation process, from describing your idea and choosing your settings to generating and refining the final result.
Step 1: Open the Create Page
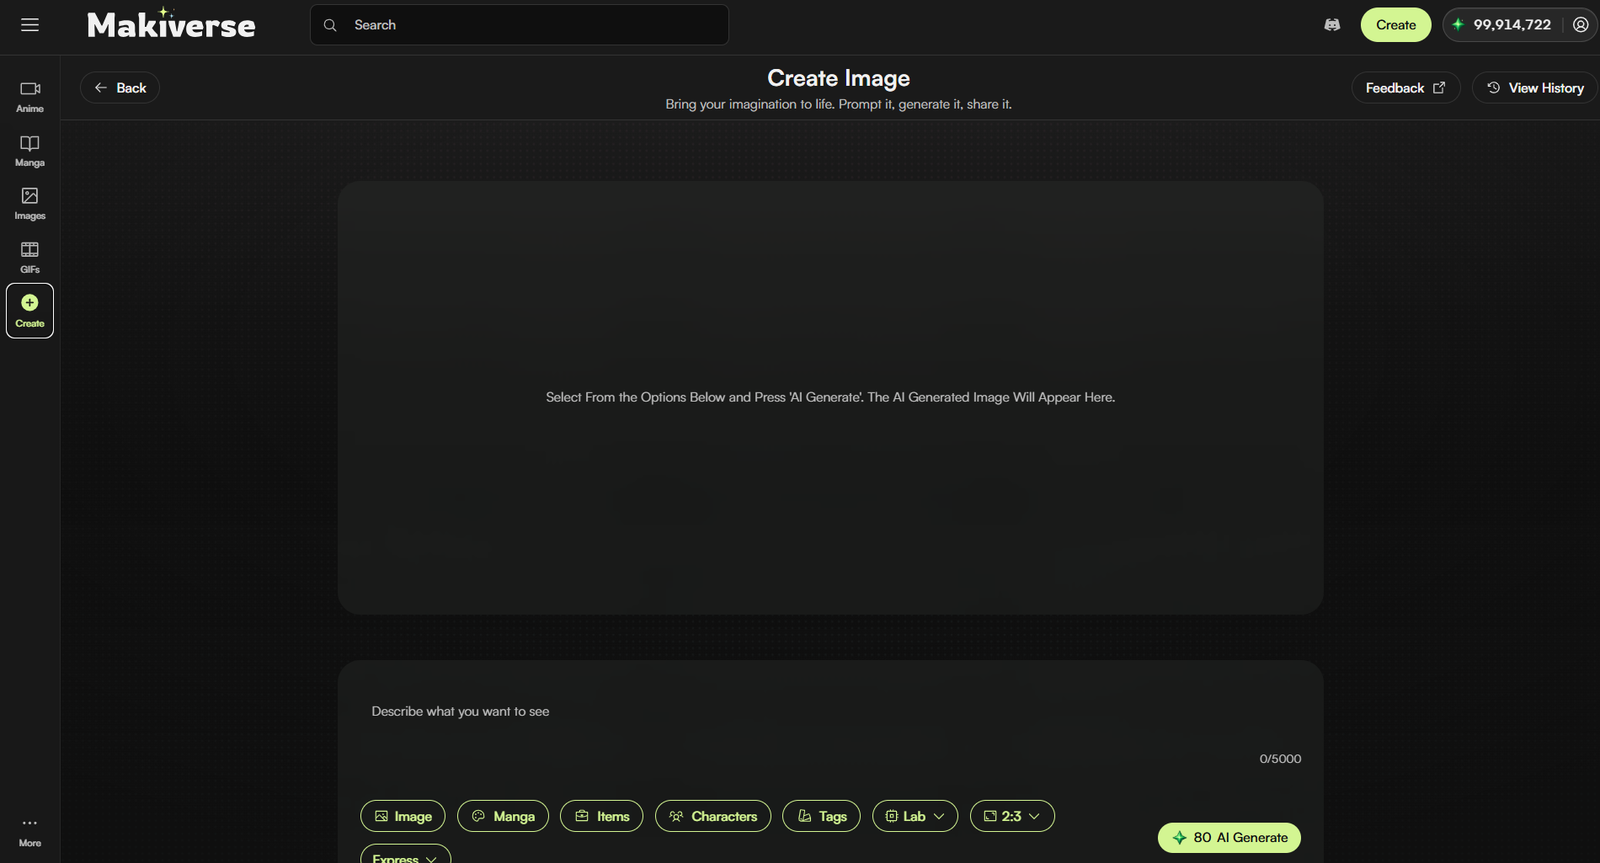
From the main navigation menu, click Create, then select Images.
This opens the Image Generator, where you can enter a Prompt and configure your generation settings.
Step 2: Enter a Prompt
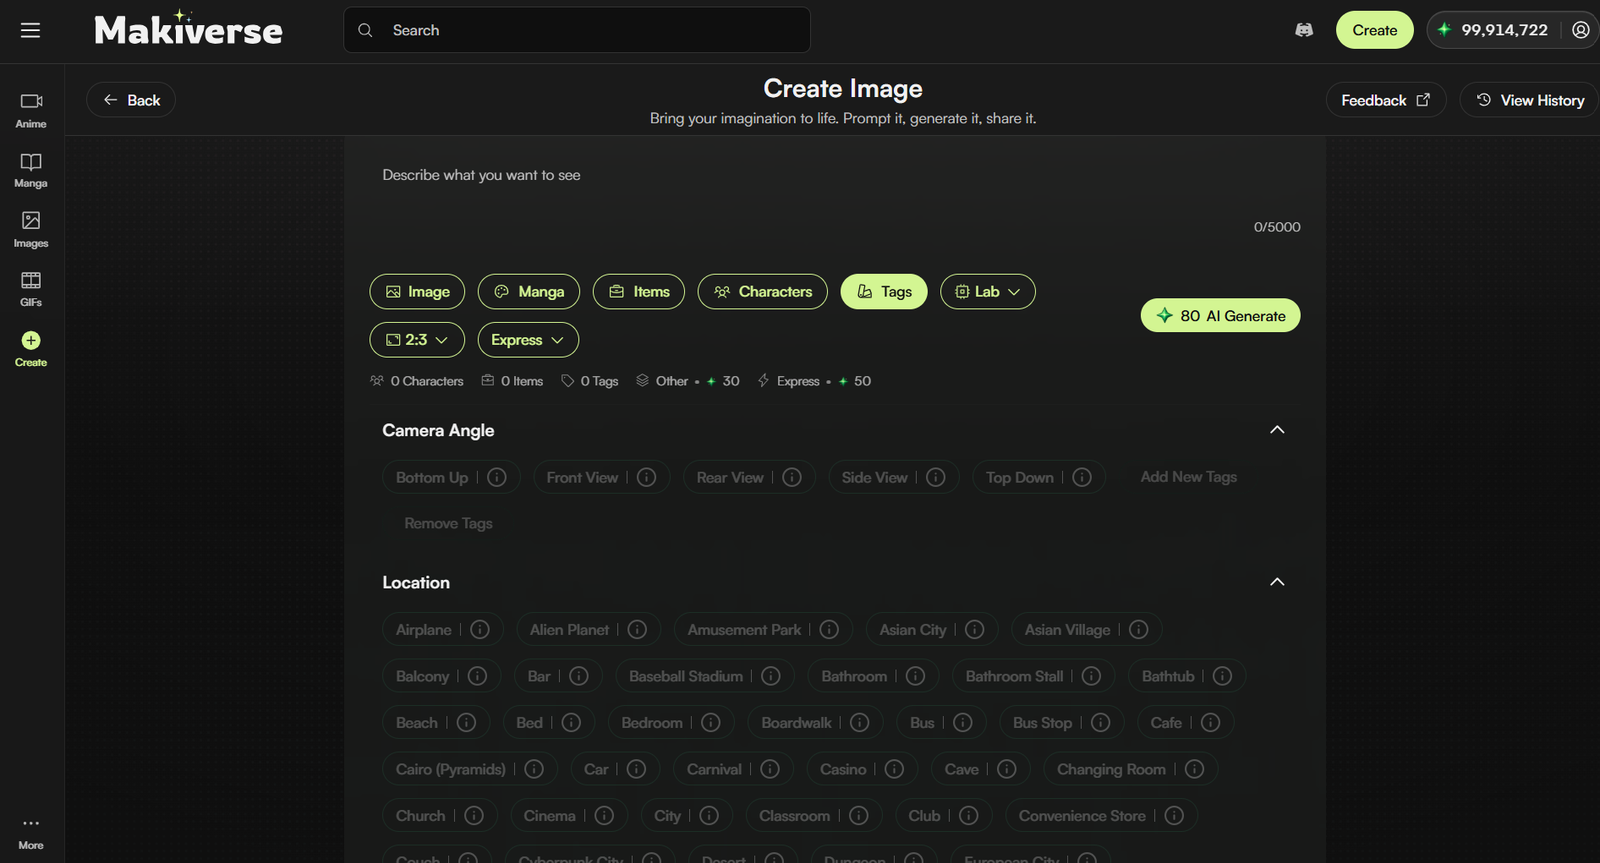
Enter a Prompt describing the Image you want to create.
A Prompt tells Makiverse what should appear in the Image. For better results, focus on the most important details, such as:
- Subject
- Appearance
- Clothing
- Pose or action
- Location
- Mood
- Lighting
- Camera angle
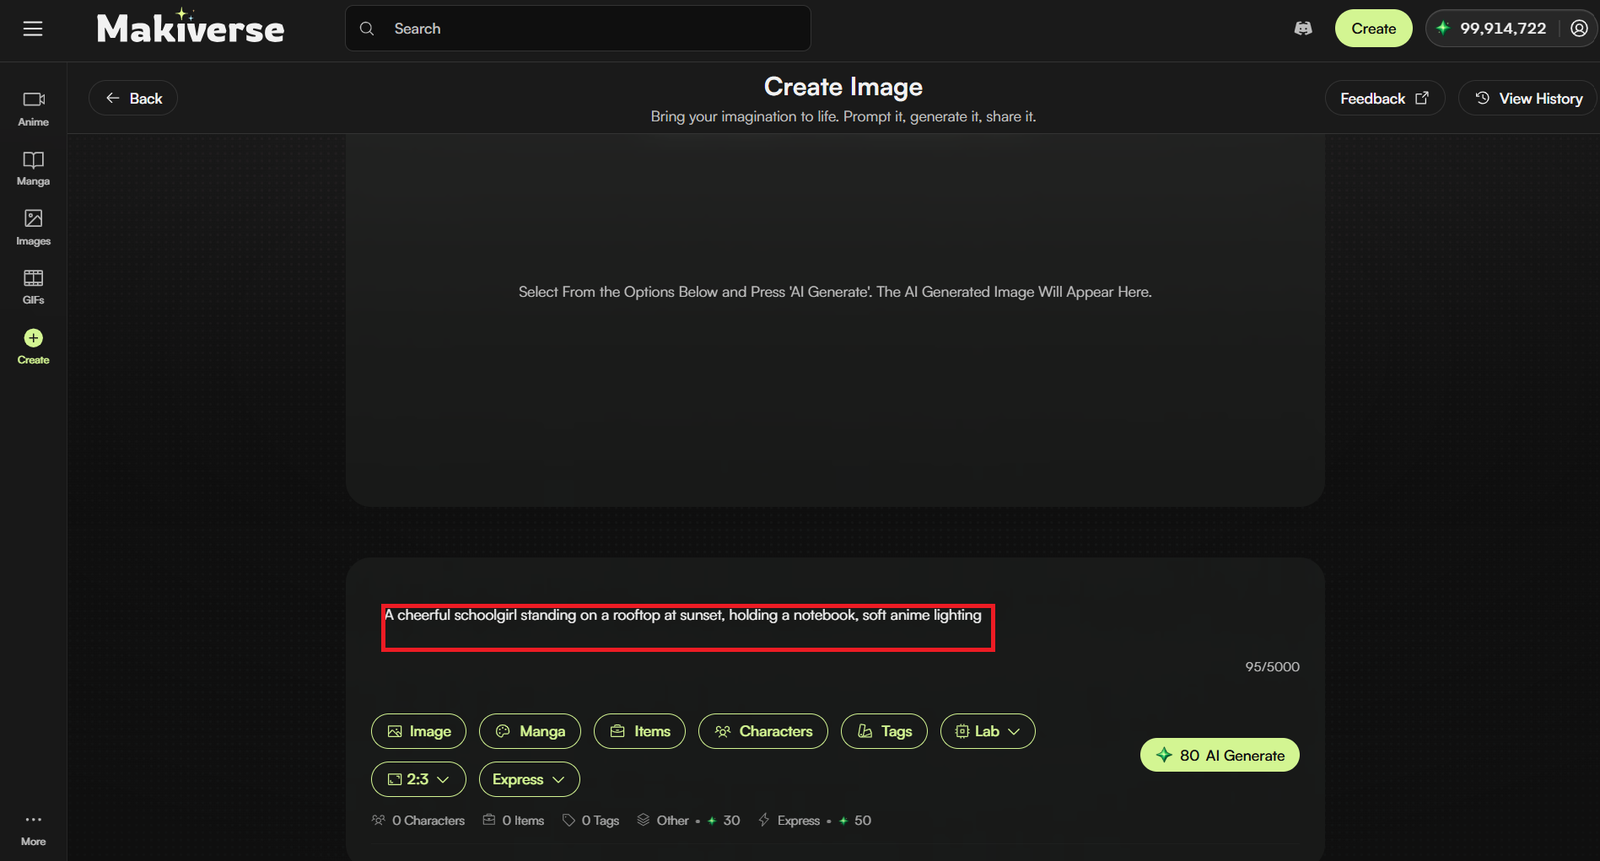
Example Prompt:
A cheerful schoolgirl standing on a rooftop at sunset, holding a notebook, soft anime lighting
After each generation, you can adjust your Prompt or Tags to refine the result.
Step 3: Select Image Generation
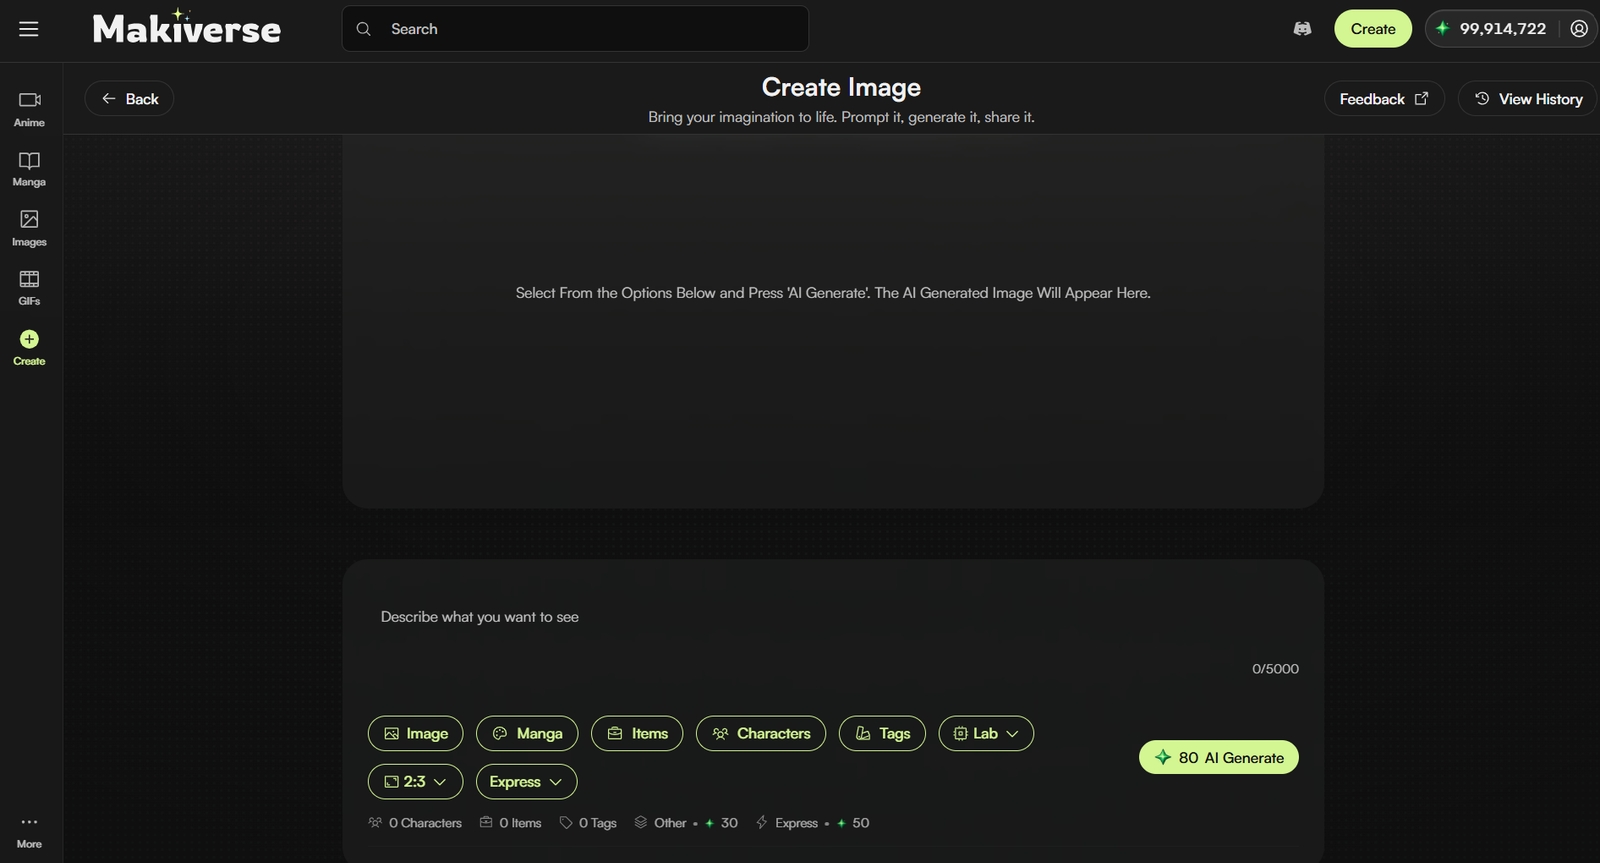
Make sure Image is selected in the output options.
This tells Makiverse to create a still Image instead of another available format, such as a GIF.
Step 4: Select a Style
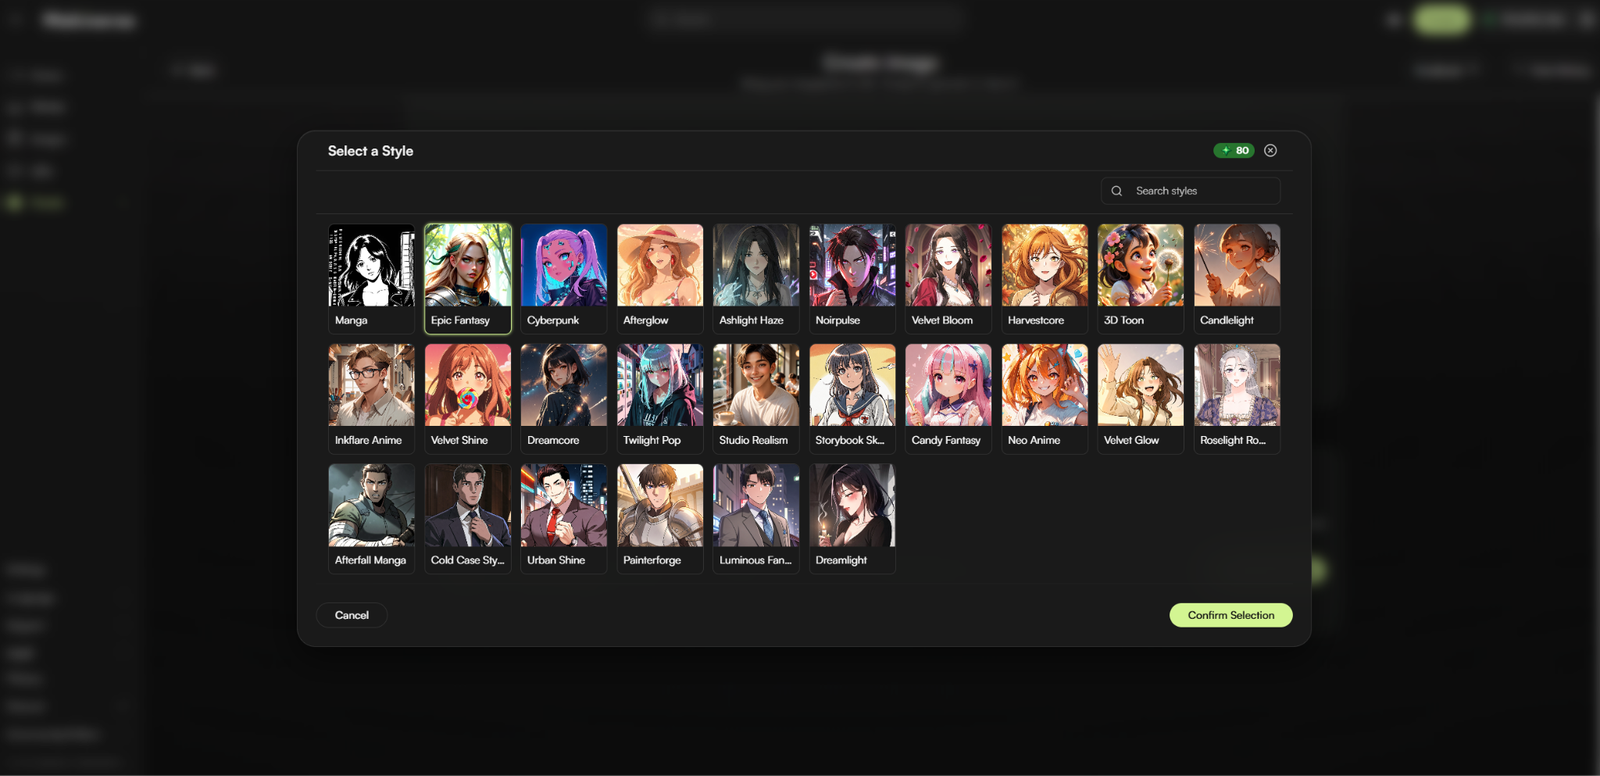
Choose the Style you want for your Image.
Styles help define the overall look, mood, and artistic direction of the final result.
Different Styles can create different visual effects, such as Anime, Manga, fantasy, realistic, and other stylized artwork.
Choose the Style that best matches the type of Image you want to create.
Step 5: Select Items
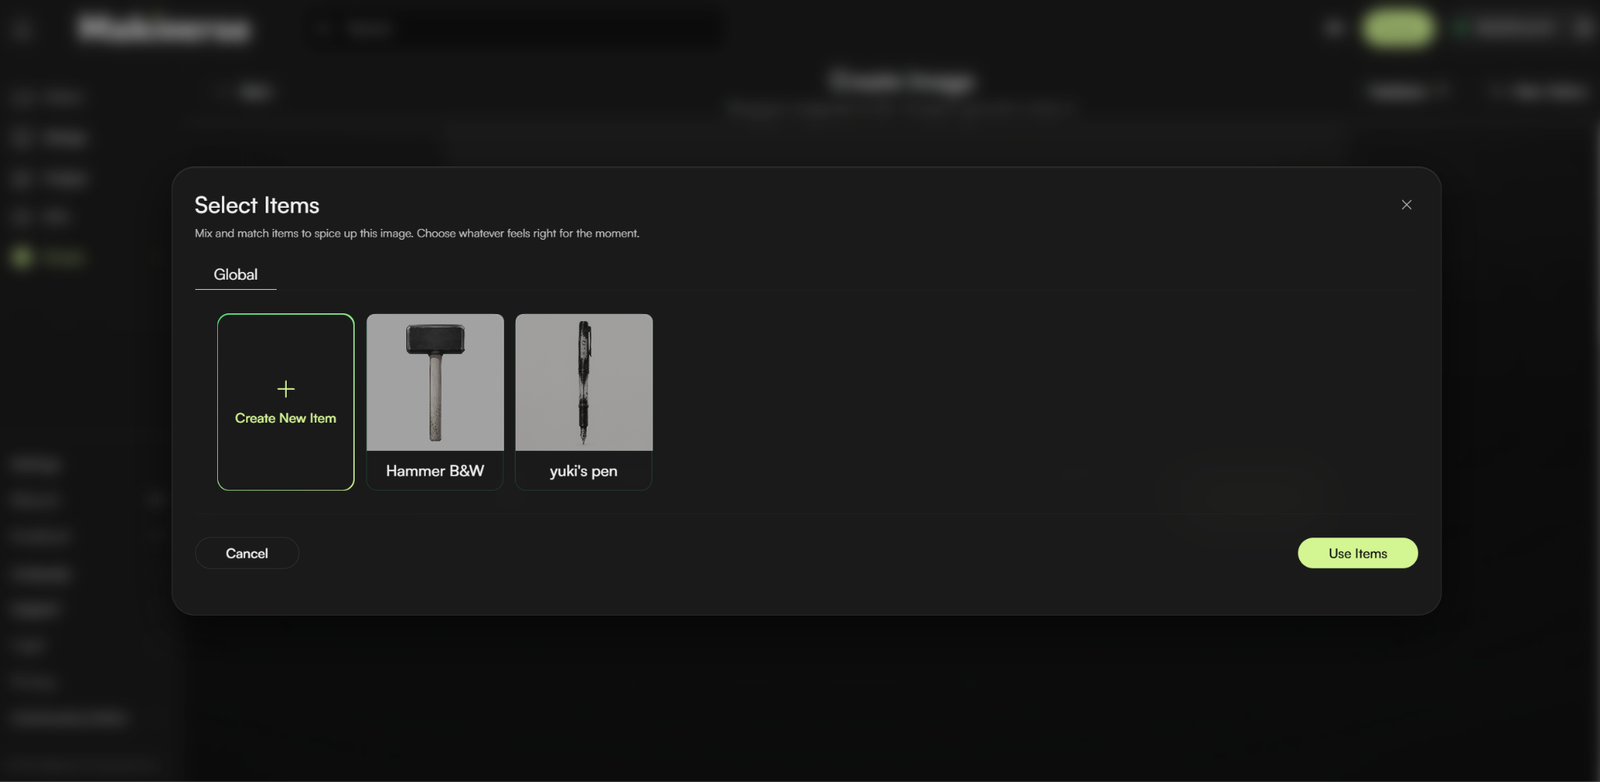
Items let you add saved Props or objects to your Image.
Use an Item when an important object should appear in the scene, such as:
- Weapons
- Tools
- Accessories
- Furniture
- Story Props
- Recurring objects
Using saved items can also help keep important Props more consistent across multiple generations.
Note: Items are optional. You do not need to add an Item to generate an Image.
Step 6: Select Characters
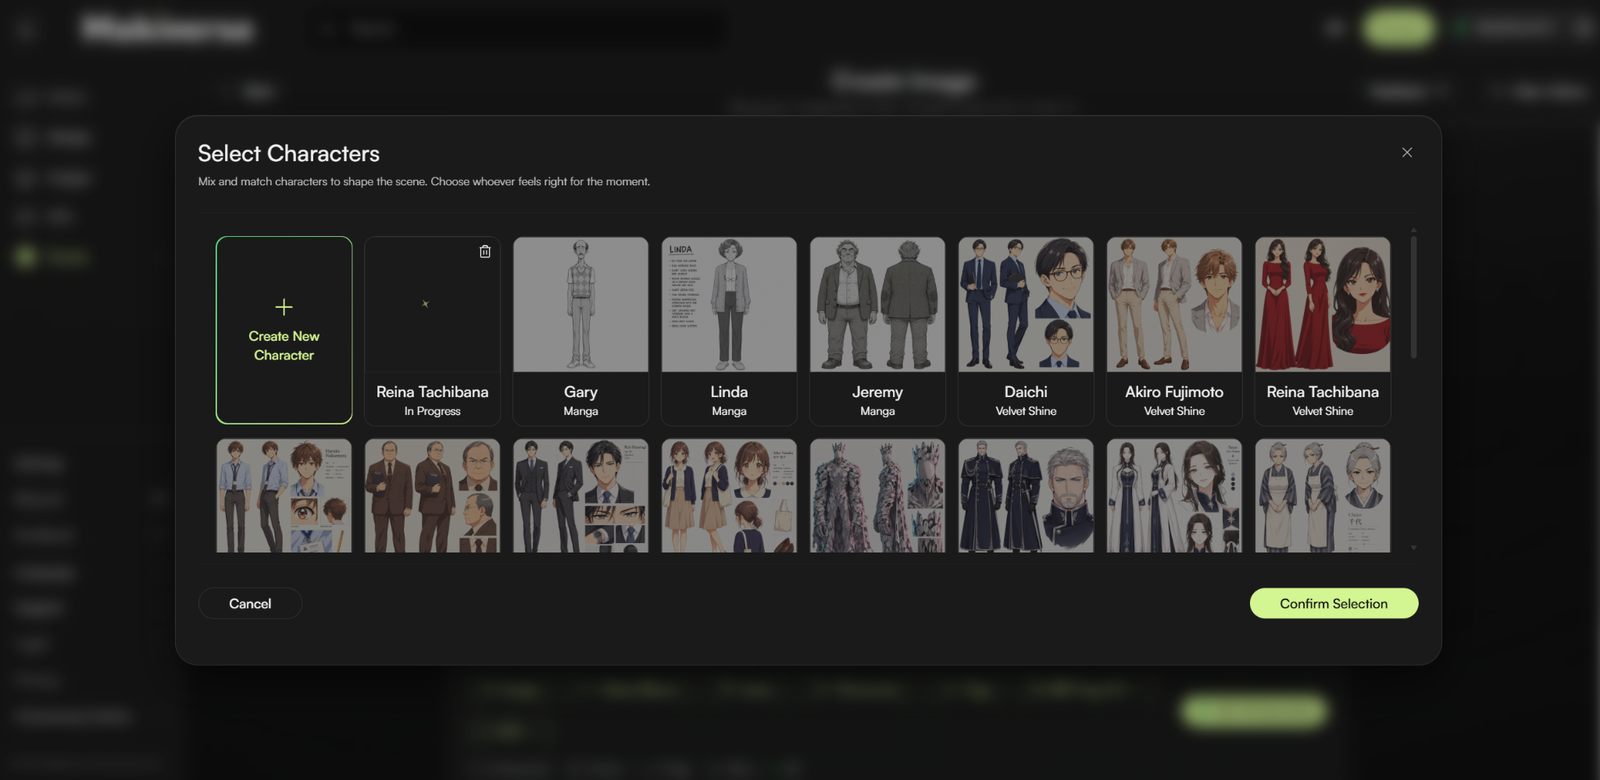
Characters let you use saved Character references in your generation.
Use a saved Character when you want the same Character to appear across multiple Images or scenes with a more consistent design.
Characters are useful for:
- Manga and Anime Characters
- Story casts
- Character-focused scenes
- Recurring Characters
- Image sets featuring the same Character
Note: Characters are optional. You can generate an Image without selecting a saved Character.
Step 7: Select Tags
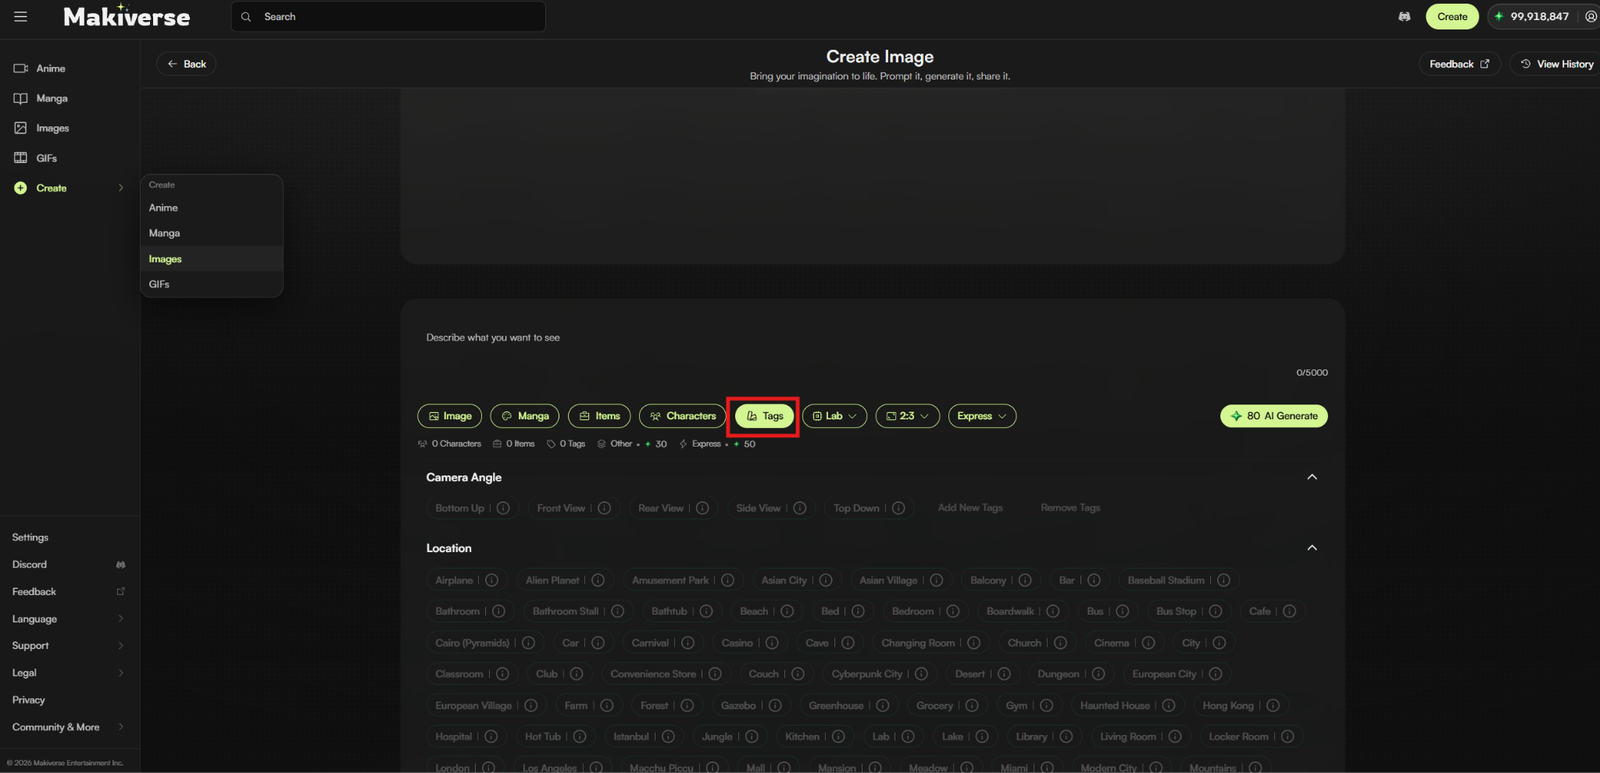
Tags are optional preset details that help guide your generation without requiring a longer Prompt.
You can use Tags to quickly add details such as:
- Location
- Camera angle
- Lighting
- Time of day
- Action
- Scene type
- Subject details
You can use Tags on their own or together with a Prompt.
For more control, use your Prompt to describe the main idea and Tags to add supporting scene details.
Tips for Using Tags
Start with a few Tags
Begin with a small number of Tags and add more only when needed.
Use Tags for scene setup
Use Tags to establish details such as the location, lighting, or camera angle.
Avoid too many Tags
Selecting too many Tags at once can make the generation harder to control.
Use Tags for consistency
Repeating the same Tags can help maintain similar scene details across multiple generations.
Combine Tags with other tools
Using Characters, Items, Tags, and Prompts together can give you more control over the final result.
Step 8: Choose an Aspect Ratio
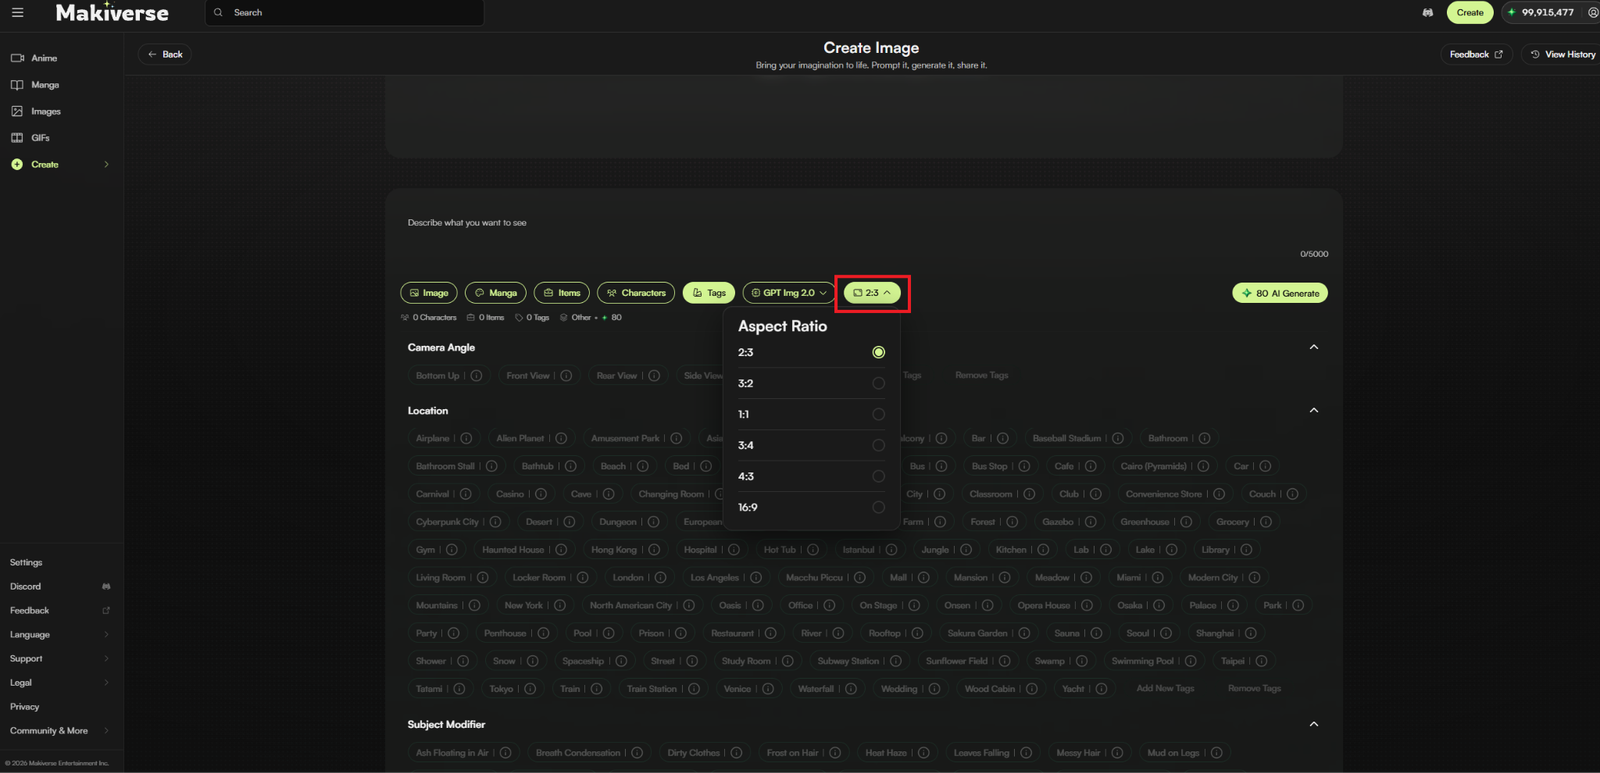
Select the image shape you want.
Aspect Ratio controls how wide or tall the final image will be.
Common options include:
1:1 Square
Best for:
- Profile pictures
- Character portraits
- Social media posts
2:3 Portrait
Best for:
- Full-body character art
- Posters
- Mobile wallpapers
16:9 Landscape
Best for:
- Backgrounds
- Cover art
- Thumbnails
- Desktop wallpapers
3:2 Landscape
Best for:
- Scenic illustrations
- Group character art
- Desktop backgrounds
- Storytelling scenes
3:4 Portrait
Best for:
- Character portraits
- Fashion illustrations
- Book covers
- Social media artwork
4:3 Landscape
Best for:
- Anime scenes
- Group portraits
- Environmental illustrations
- Classic-style artwork
Choose the Aspect Ratio based on how you plan to use the final image.
Step 9: Select an Image Generation Engine
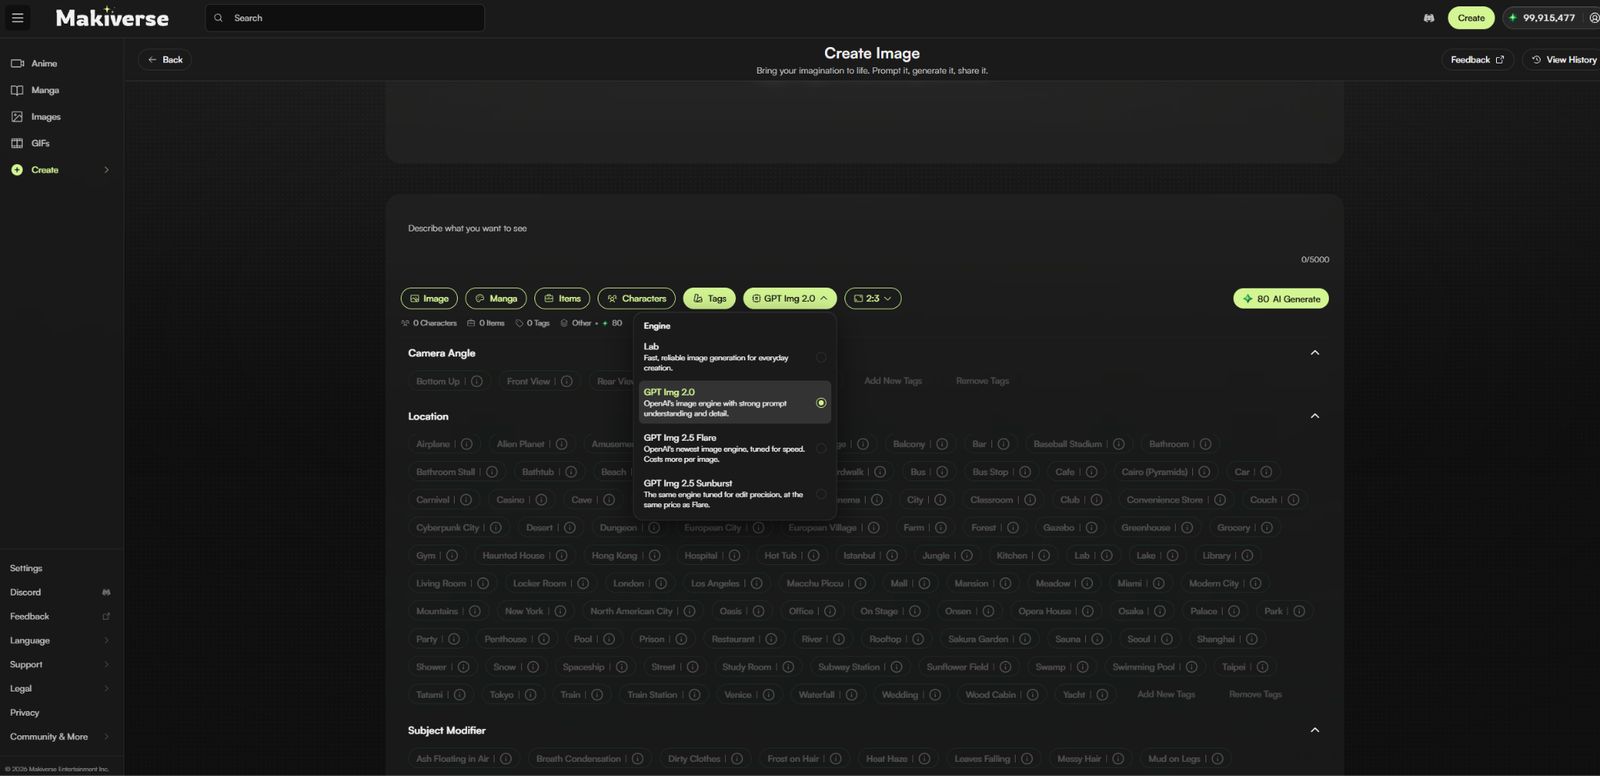
Open the Engine dropdown and select the Image generation engine you want to use.
Available engines may offer different generation capabilities or results.
Choose the engine that best fits the type of Image you want to create.
Best for:
- Detailed anime and manga illustrations
- Accurate character and scene generation
- Complex prompts with multiple elements
- High-quality artwork with refined details
Step 10: Generate Your Image
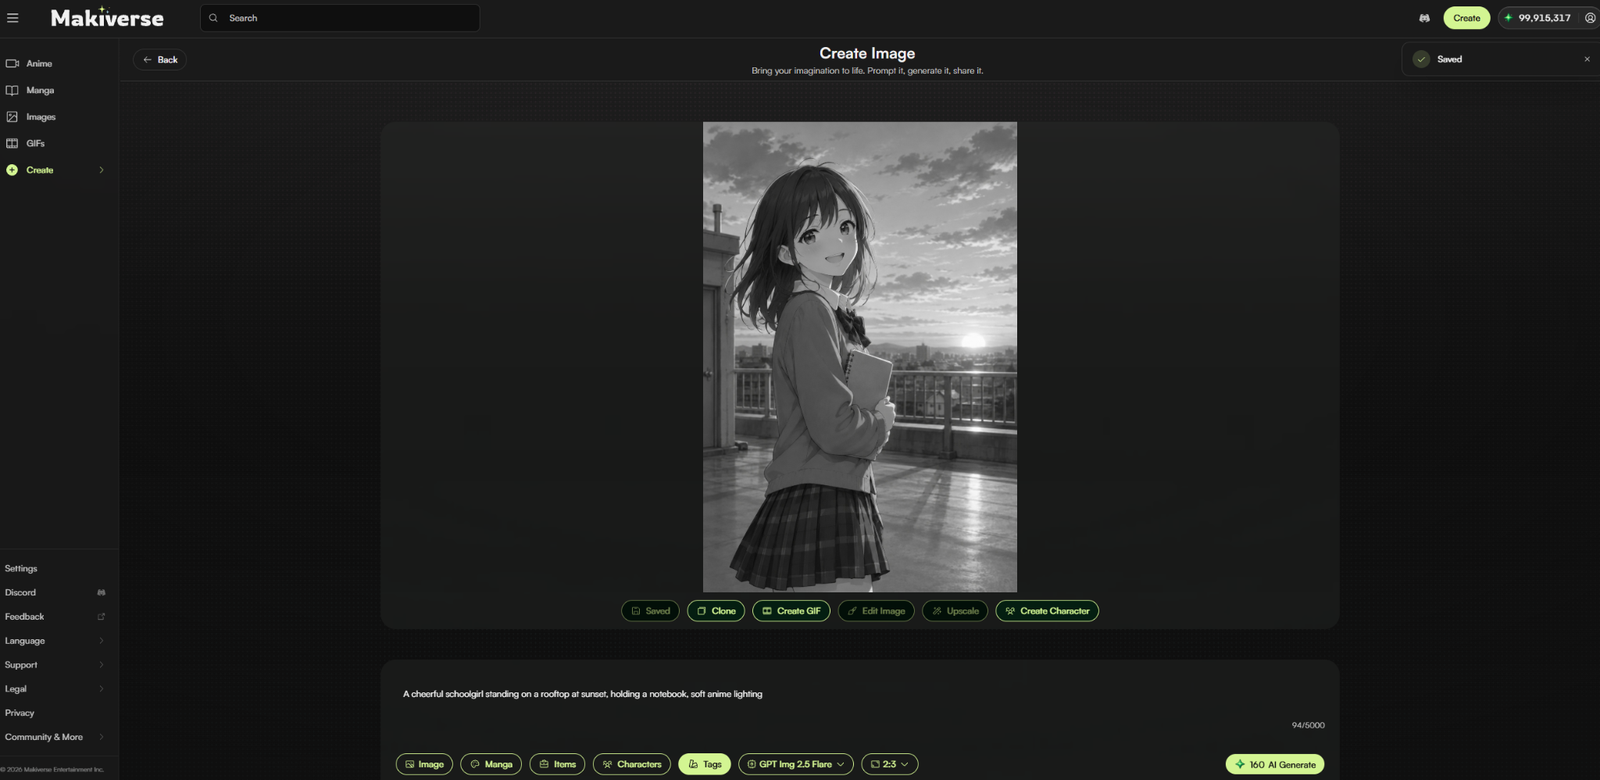
Once your Prompt and settings are ready, click AI Generate.
Makiverse will begin creating your Image.
When generation is complete, review the result in the preview area.
If needed, adjust your:
- Prompt
- Tags
- Style
- Characters
- Items
- Aspect Ratio
- Generation settings
Then generate another version until you are happy with the result.
Tips for Better Image Generation
Keep Your Prompt Clear
Focus on the main subject and the most important visual details instead of adding unnecessary instructions.
Describe What Matters Most
Include details such as the Character, pose, setting, mood, and lighting when they are important to the result.
Use Saved Characters for Consistency
Select saved Characters when you want the same Character design to appear across multiple generations.
Use Items for Important Props
Add saved Items when a recurring object needs to appear in your scene.
Use Tags to Build Scenes Faster
Tags can quickly add common details such as lighting, location, action, or camera angle.
Choose the Right Aspect Ratio
Think about where you plan to use the Image before selecting its shape.
Try Another Generation
If the first result is not what you expected, adjust your Prompt or settings and generate another version.
Need Help?
If your Image does not look the way you expected, try:
- Simplifying or refining your Prompt
- Making the subject or action clearer
- Adjusting your Tags
- Trying a different Style
- Reviewing your selected Characters or Items
- Changing your generation settings
- Generating another version
If you run into a technical issue, check the Troubleshooting section for common solutions.
If the issue continues, contact Makiverse Support for additional help.
You can also join the Discord Community to report bugs, share feedback, suggest new features, and connect with other creators.